Send out notifications or listen for webhooks before or after events
There are a few ways in which you can setup Timekit to send out notifications to users/resources and customers, either before or after a booking. In this guide, we'll go over all of them.
Reminder emails
The easiest way to send reminder emails before a booking is to use the built-in reminder emails in Timekit. If you prefer using your own emails, jump to the next section where we talk about using webhooks to achieve the same result.
When you create a booking, you can pass an array of event_notifications along with the booking. Notifications can have one of two types; email or webhook. If you choose email, Timekit will use its default reminder email template.
Let's say we want to send a reminder email to both the owner and the customer an hour before the booking begins. This is pretty straightforward with Timekit:
// Replace {{calendar_id}} with the id of the calendar
{
	"graph": "instant",
	"action": "confirm",
	"customer": {
		"name": "Marty McFly",
    "email": "[email protected]"
	},
	"event": {
		"start": "2016-11-23 15:00:00",
		"end": "2016-11-23 16:00:00",
		"what": "Mens haircut",
		"where": "Sesame St, Middleburg, FL 32068, USA",
		"calendar_id": "{{calendar_id}}"
	},
	"event_notifications": [
		{
			"type": "email",
			"settings": {
				"recipient": "customer",
				"subject": "Upcoming booking"
			},
			"when": {
				"type": "before",
				"unit": "mins",
				"time": 60
			}
		},
		{
			"type": "email",
			"settings": {
				"recipient": "owner",
				"subject": "Upcoming booking"
			},
			"when": {
				"type": "before",
				"unit": "mins",
				"time": 60
			}
		}
	]
}
curl --request POST \
  --url https://api.timekit.io/v2/bookings \
	-u <email>:<token> \
  -H 'Content-Type: application/json' \
  -H 'Timekit-App: <your-app-slug>' \
  -d '{
	"graph": "instant",
	"action": "confirm",
	"customer": {
		"name": "Marty McFly",
		"email": "[email protected]"
	},
	"event": {
		"start": "2016-11-23T15:00:00+00:00",
		"end": "2016-11-23T16:00:00+00:00",
		"what": "Mens haircut",
		"where": "Sesame St, Middleburg, FL 32068, USA",
		"calendar_id": "<your-calendar-id>"
	},
	"event_notifications": [
		{
			"type": "email",
			"settings": {
				"recipient": "customer",
				"subject": "Upcoming booking"
			},
			"when": {
				"type": "before",
				"unit": "mins",
				"time": 60
			}
		},
		{
			"type": "email",
			"settings": {
				"recipient": "owner",
				"subject": "Upcoming booking"
			},
			"when": {
				"type": "before",
				"unit": "mins",
				"time": 60
			}
		}
	]
}'
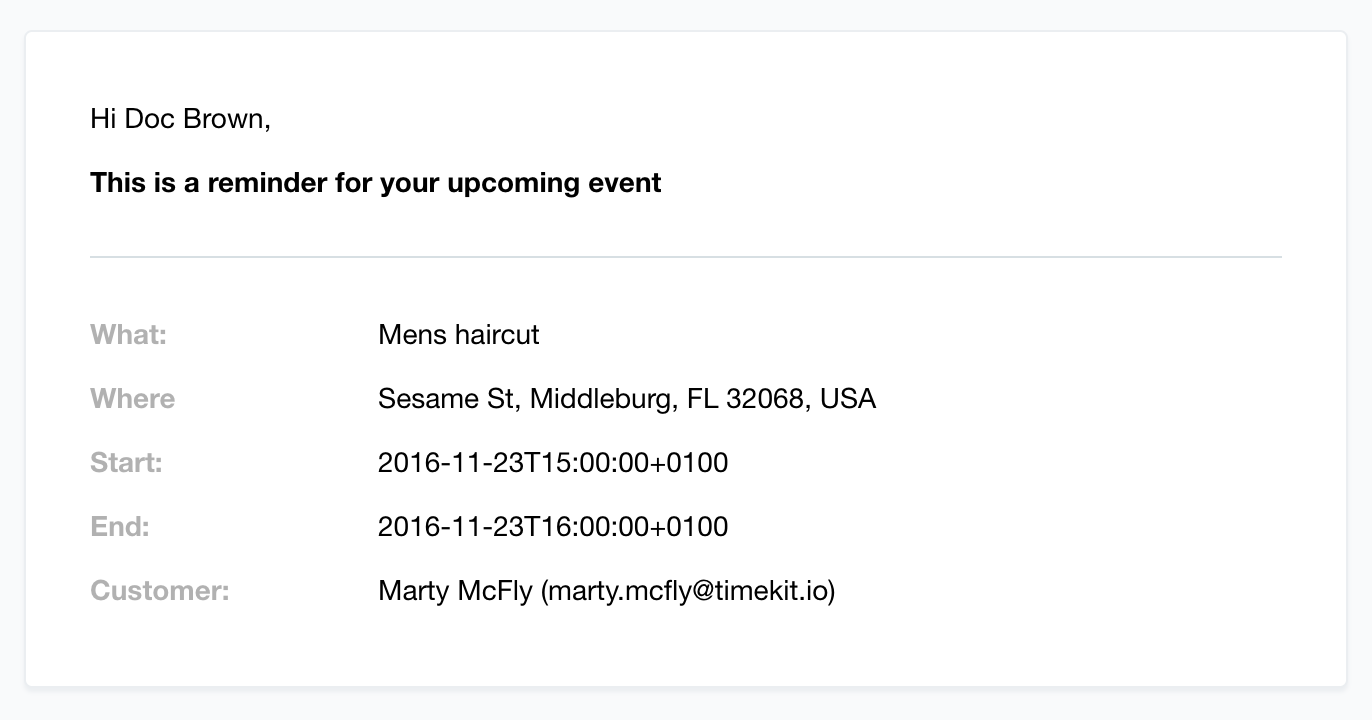
This is the JSON we would [POST] to create the booking. 60 minutes before the booking begins, an email will be sent to both the owner and the customer with a reminder. The email looks something like this:

Webhook notifications
In addition to emails, you can also set up webhook notifications that can be fired either before or after the booking begins. This is useful if you want to send your own emails, and just want to know when to send them.
Webhooks can be used for many other things than just reminders. Maybe you want to send out a questionnaire to your customers a day after the booking?
Using the latter example, let's set up a webhook notification to go out 24 hours after the booking began. This is the JSON we will [POST] to create the booking:
{
	"graph": "instant",
	"action": "confirm",
	"customer": {
		"name": "Marty McFly",
    	"email": "[email protected]"
	},
	"event": {
		"start": "2016-11-23 15:00:00",
		"end": "2016-11-23 16:00:00",
		"what": "Mens haircut",
		"where": "Sesame St, Middleburg, FL 32068, USA",
		"calendar_id": "{{calendar_id}}"
	},
	"event_notifications": [
		{
			"type": "webhook",
			"settings": {
				"url": "https://example.com/some-endpoint",
				"method": "post",
				"expected_response_code": 200
			},
			"when": {
				"type": "after",
				"unit": "hours",
				"time": 24
			}
		}
	]
}
24 hours after the booking begins, Timekit will then send a POST request to https://example.com/some-endpoint and expect a 200 response.
The payload of the webhook request looks similar to the response you get when you [GET] the /bookings/:id endpoint.
App level notifications
Instead of configuring notifications for each individual booking, they can also be configured on an app level. If you set notifications up on the app level, they will be created for each booking created under that app.
Overwriting app level notifications
Sending an array of
event_notificationswill overwrite the app level notifications for the booking.
Let's say we always (at least by default) want to send a reminder email to the owner and customer before a booking. We can update our application settings to include the app level notifications. All this requires is a [PUT] request with the same event_notifications array to the /apps/:slug endpoint:
{
	"event_notifications": [
		{
			"type": "email",
			"settings": {
				"recipient": "customer",
				"subject": "Upcoming booking"
			},
			"when": {
				"type": "before",
				"unit": "mins",
				"time": 60
			}
		},
		{
			"type": "email",
			"settings": {
				"recipient": "owner",
				"subject": "Upcoming booking"
			},
			"when": {
				"type": "before",
				"unit": "mins",
				"time": 60
			}
		}
	]
}
Now, every time a booking is created, two notifications will be created: One for the owner and one for the customer.
Aaaand that's it! If you have any questions about how to set up notifications for your bookings, hit us up on the chat.
We recommend that you also take a look at our guide "Building booking experiences with Timekit".
