Connect to Zapier
Catch webhooks from Timekit in Zapier
Prerequisites
- Zapier account, signup here: https://zapier.com
Overview:
- Step 1: Setup a trigger app
- Step 2: Catch hook
- Step 3: Get the hook url
Step 1: Setup a trigger app
First navigate to zapier.com and login to your account.
Click "Make a Zap".
Then search for "webhook" in the search bar:
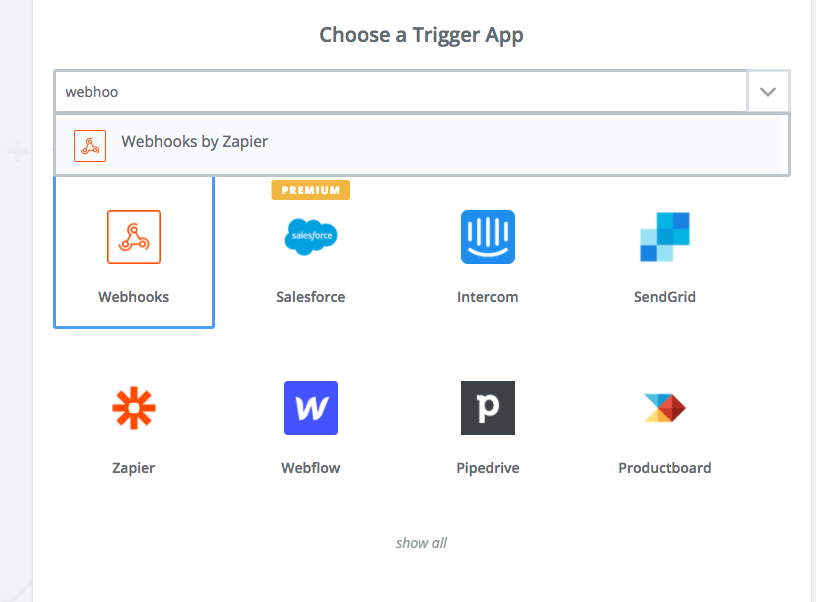
Select the "webhooks" app by Zapier.
Step 2: Catch hook
Select "Catch hook" so this will be triggered when a new booking is creating on Timekit.
Click "continue" on this step and also the next step called "Set up Webhooks by Zapier Hook".
Step 3: Get the hook url
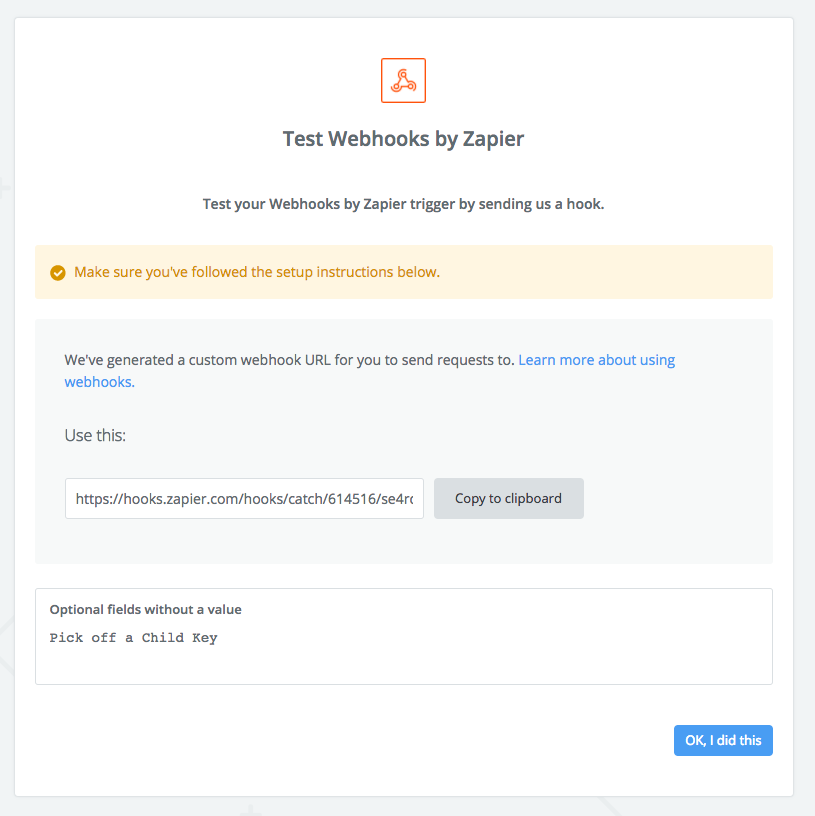
This is the url you need. Click "Copy to clipboard" and you are ready to use this in the Timekit Admin.
Send custom emails and other notifications with webhooks via Zapier
This is a guide on how to setup Zapier to send custom emails or other notifications when a booking state changes in Timekit.
After reading this part you will be able to use Timekit’s webhooks to trigger emails and other notifications via Zapier.
This Guide focuses on sending out a Zapier email but the same approach will also work to trigger notifications with Zapiers more than 750 connected apps.
There are 5 simple steps in this guide and it will take less than 5 minutes to set up.
Prerequisites
- A Timekit account, signup here: https://admin.timekit.io
- A Timekit project setup - Setup project
- Zapier account, signup here: https://zapier.com
- You have setup Zapier to catch webhooks - See this guide
Overview
- Step 1: Setup webhook on
- Step 2: Create a booking
- Step 3: Handle the webhooks
- Step 4: Design the email
- Step 5: Disable email notifications
Note: Step 4 & 5 is where you need to change it up if you would like to trigger other Zapier Apps like sending an SMS, posting in Slack or creating a Trello card.
Step 1: Setup webhook on Timekit
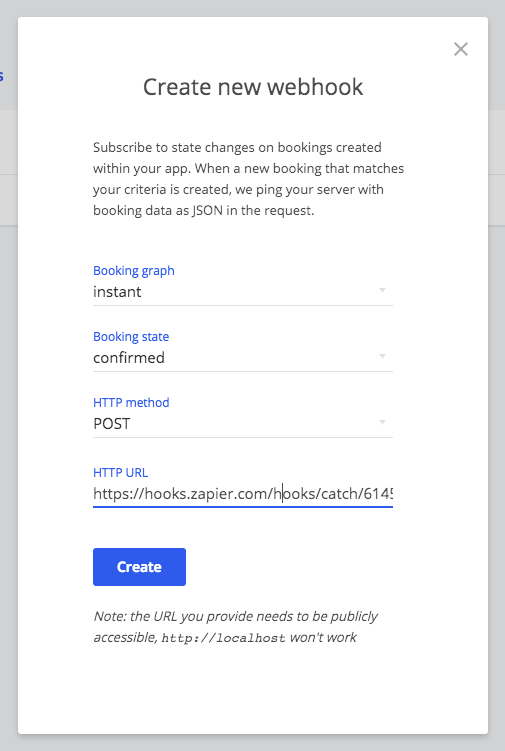
Navigate to your webhook settings.
Remember to select the booking graph and the state that fits your use case.
In this example, we are creating a webhook that triggers when a booking is confirmed which is why we have selected "Instant" and "confirmed". In case you wanted to send a custom email when the booking was canceled the booking state should be set as "canceled" or "canceled by customer".
Step 2: Create a booking
Go back to Zapier and click "OK, I did this".
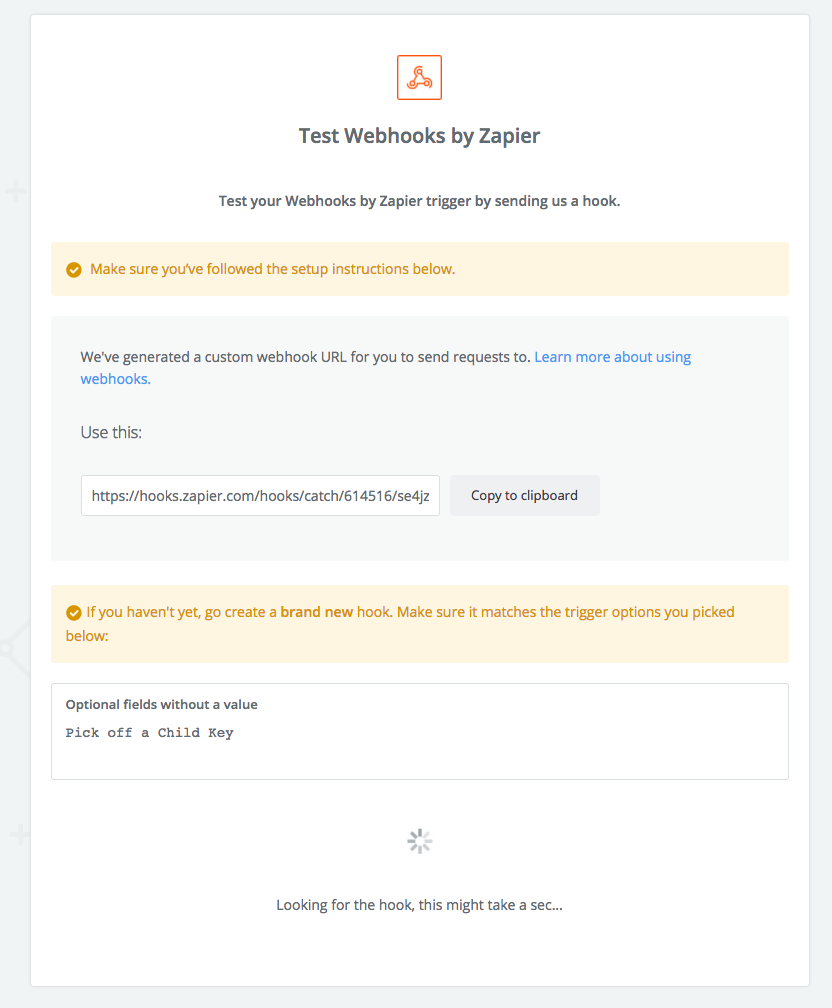
Zapier is now waiting for Timekit to send a webhook, so head back to Timekit Admin and create a booking.
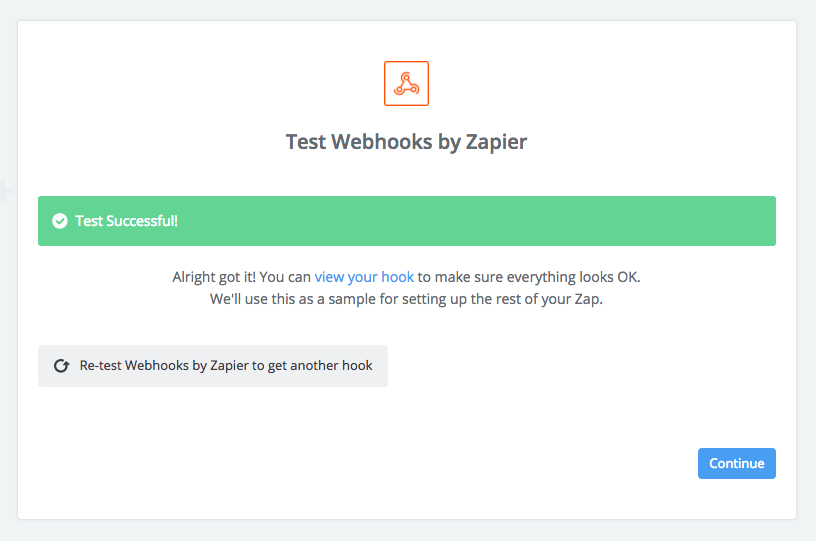
After making a booking you should see that Zapier has received a webhook (though it can be delayed up to 15 min).
Step 3: Handle the webhooks
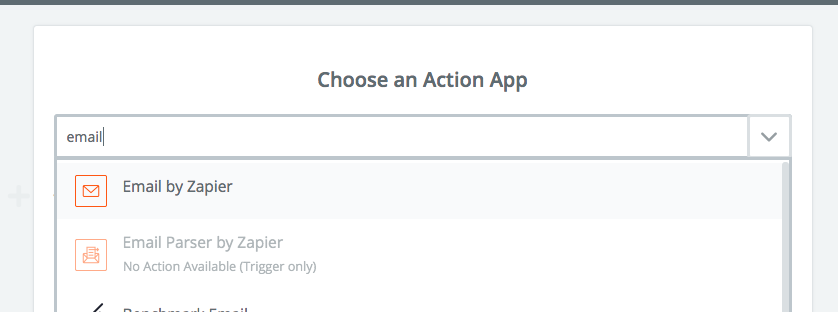
Select "Email by Zapier" when choosing an action app (or whatever action you would like the webhook to trigger - SMS, etc).
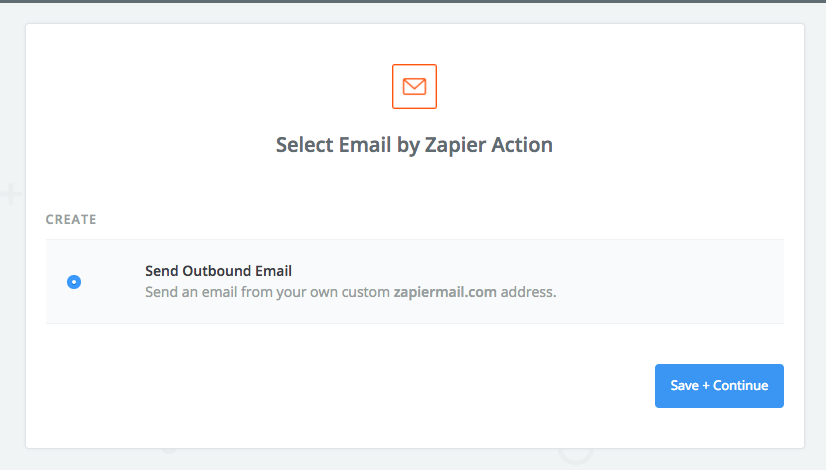
Select "Send Outbound Email" in the next step to send an email via Zapier.
Step 4: Design the email
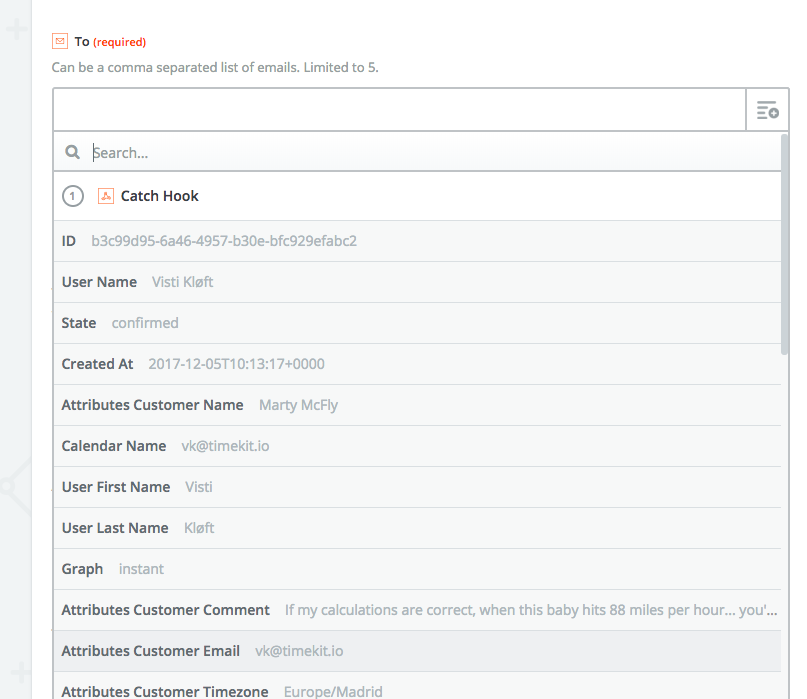
Now it's time to "design" the mail. First you need to select where to send the email. Select "Attributes Customer Email"
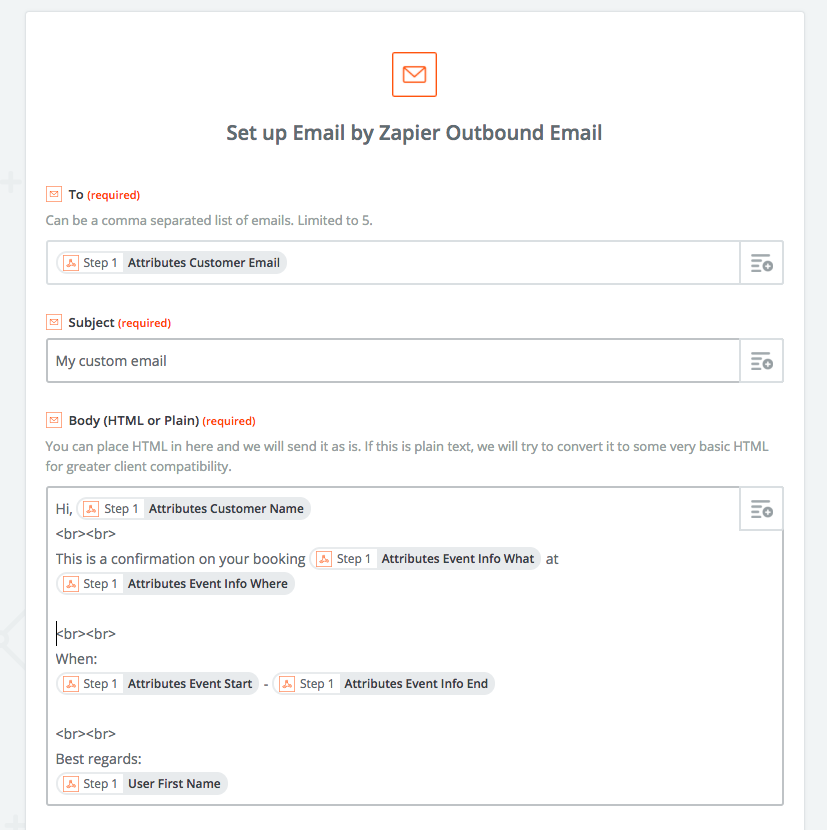
Next step is to design and write the subject and body of our email.
Step 5: Disable email notifications
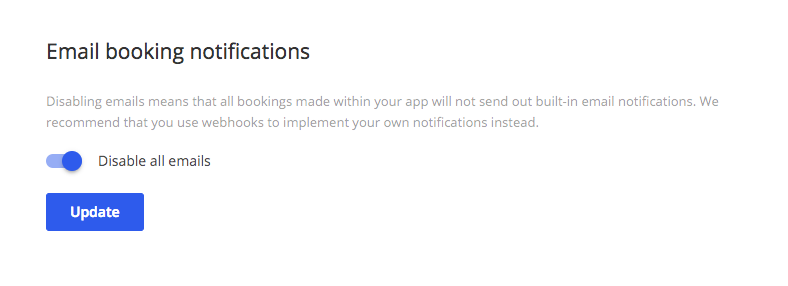
Last but not least, disable the default Timekit notifications. Go to your app settings and toggle "Disable all emails".
You have now setup a webhook that will fire off an email next time you receive a booking in Timekit - congrats 🤘
-
Note: Besides Zapier's own email engine Zaphier can also be used to trigger emails, SMS and other posts and notifications in services. We like these guys: *
Email:
Mandrill
Mailchimp
ActiveCampaign
Campaign MonitorSMS & Chat:
Twilio
CallFire
TextMagic
Burst SMSOther Services:
Slack
Trello
Salesforce
Intercom
Stripe
Check out Zapiers directory of more than 750 connected apps
Setup a Slack reminder with Zapier before a booking occurs
This guide goes over how to setup a Slack reminder with Zapier 30 minutes before a booking occurs.
After reading this guide you will be able to use Timekit’s webhooks to trigger Slack messages and other notifications via Zapier.
Note: this guide focuses on Zapier triggering Slack messages but the same approach will also work to trigger other notifications with Zapiers more than 750 connected apps.
There are 7 simple steps in this guide and it will take less than 5 minutes to set up.
Prerequisites
- A Timekit account, signup here: https://admin.timekit.io
- A Timekit project setup - Setup project
- Zapier account, signup here: https://zapier.com
- You have setup Zapier to catch webhooks - See this guide
Overview
Step 1: Create a reminder on Timekit.
Step 2: Setup Zapier to post in Slack.
Step 3: Select action.
Step 4: Select your Slack account.
Step 5: Setup your Slack message.
Step 6: Test the integration.
Step 7: Head over to Slack to see your message.
Step 1: Create reminder on Timekit.
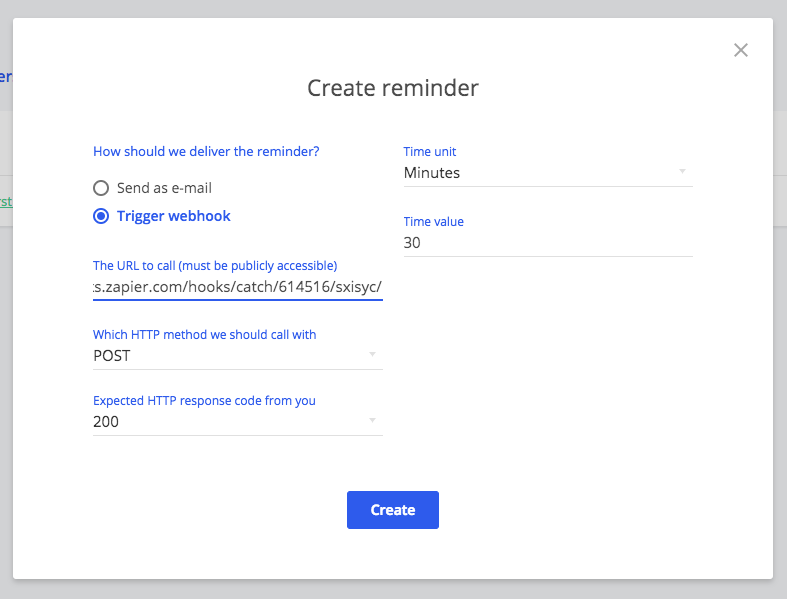
Go to your projects overview in the Timekit Admin Dashboard, select a project and click reminders in the top menu bar. Click "Create reminder" in the top right corner. Copy the Zapier webhook URL you got from this guide. Choose how long before a meeting you want the reminder. For this guide we will choose the default, 30 minutes before the booking occurs.
Step 2: Setup Zapier to post in Slack.
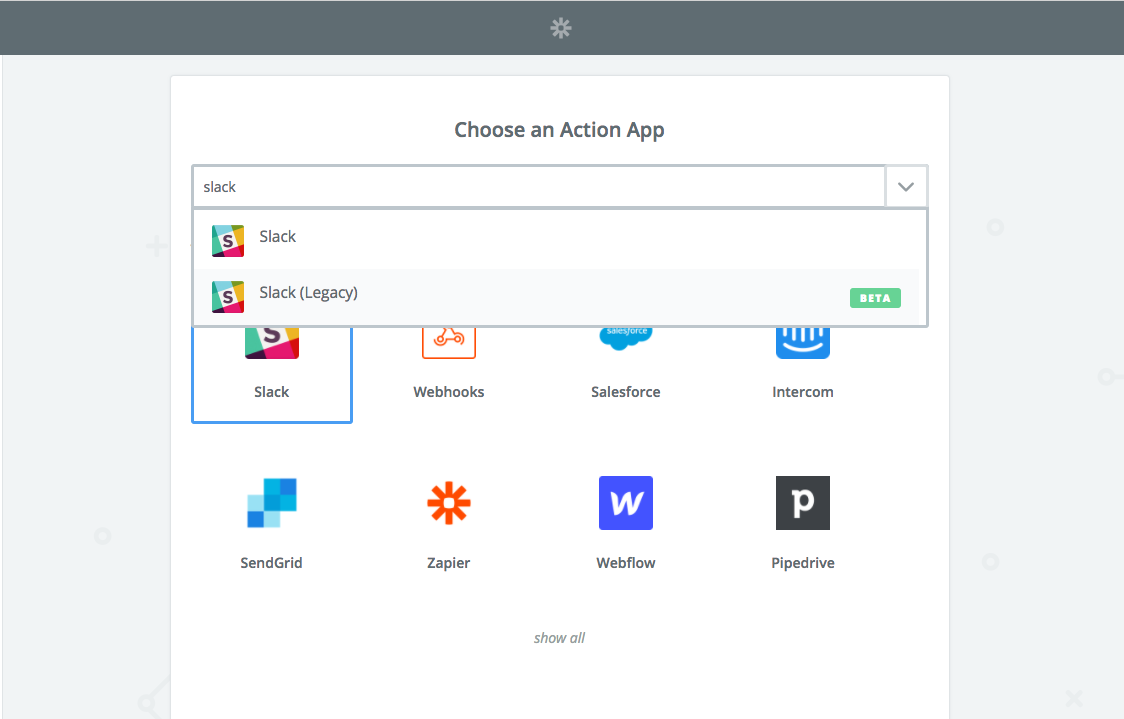
Navigate to your Zapier account. Create a new action by searching for the Slack app. When you find it then select it (not the Legacy version).
Step 3: Select action.
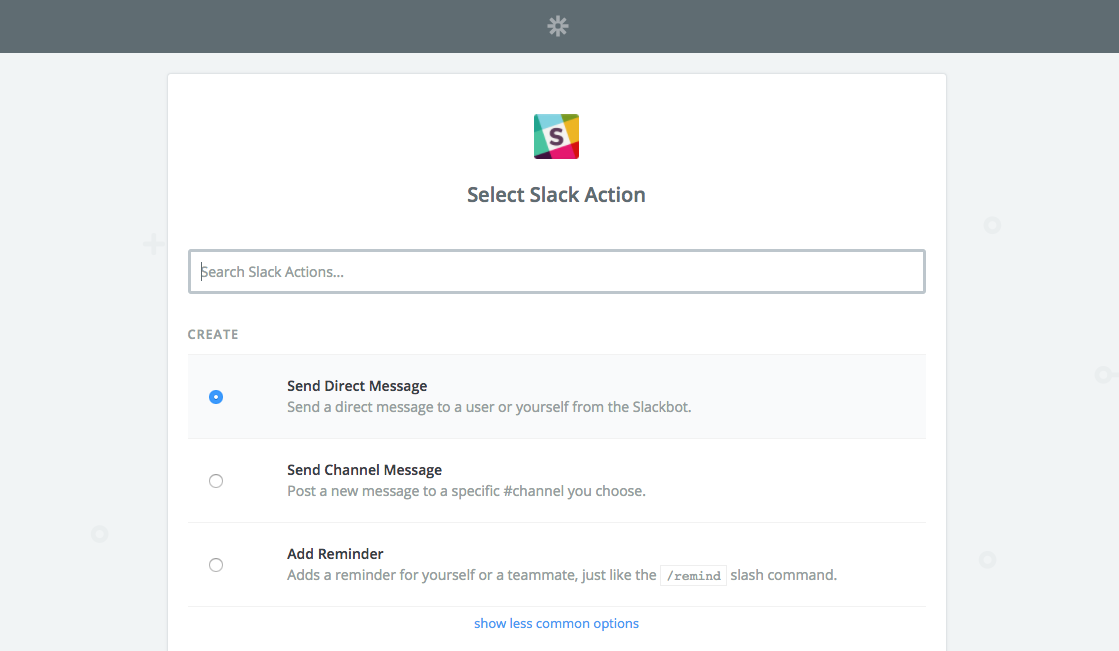
Select the action you want to happen in Slack. In this example we will choose "Send Direct Message". Any other option will also work.
Step 4: Select the Slack account.
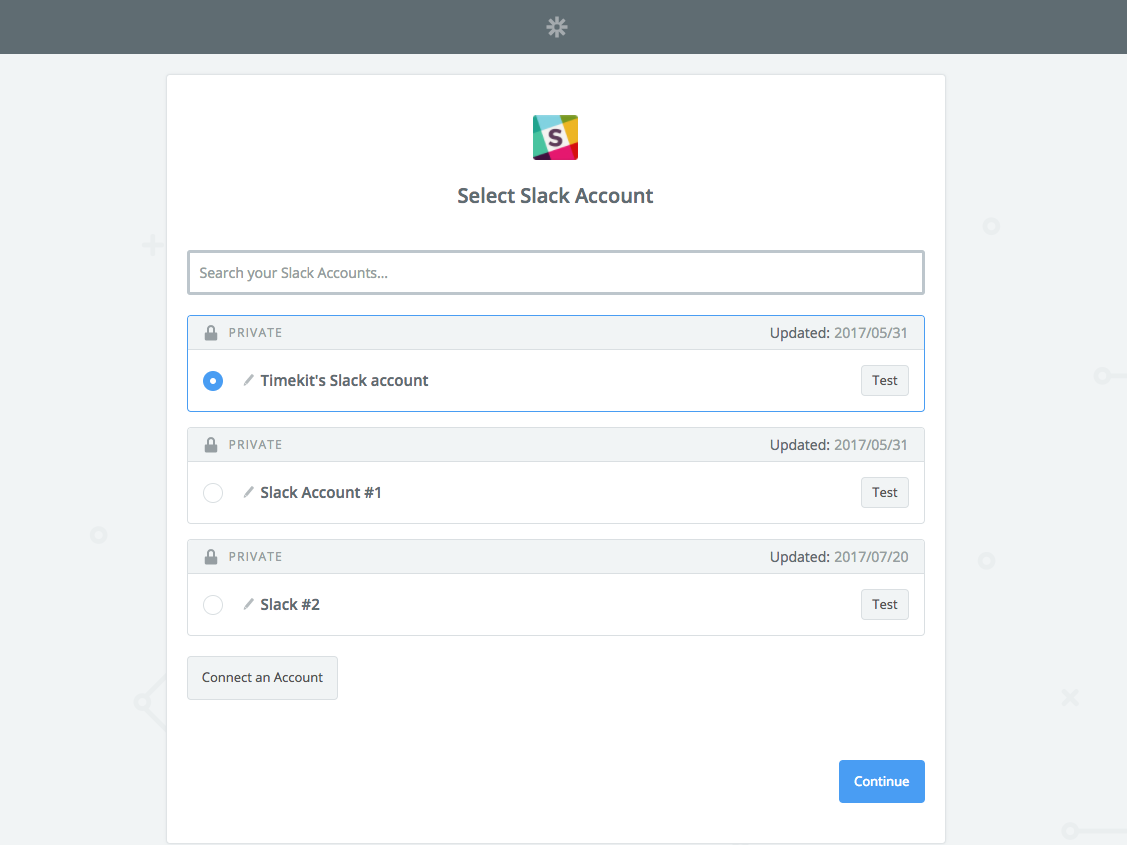
Select the Slack account you want to use.
Step 5: Setup a Slack message.
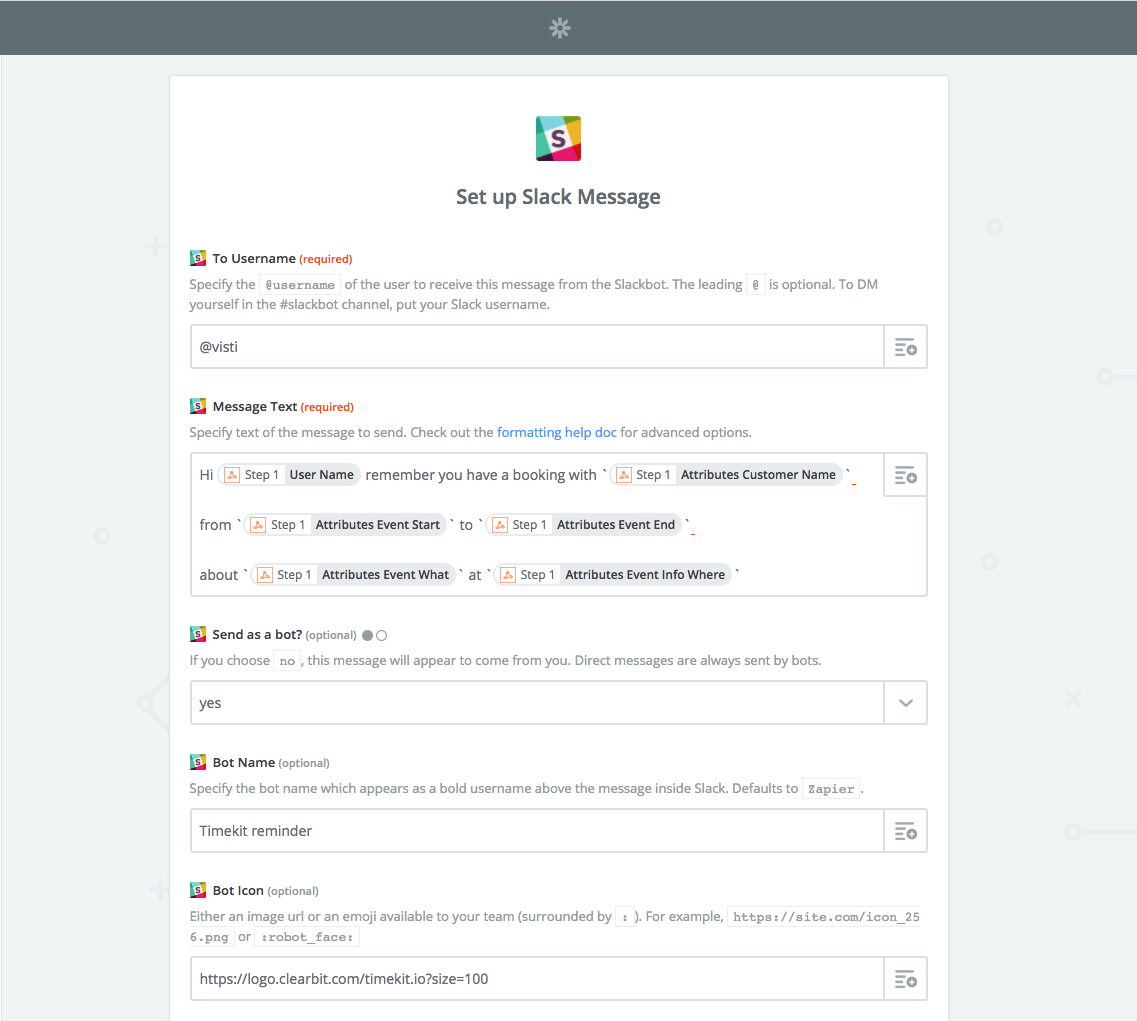
Now you need to decide which person is going to get this message and what content you want to post.
Step 6: Test the integration.
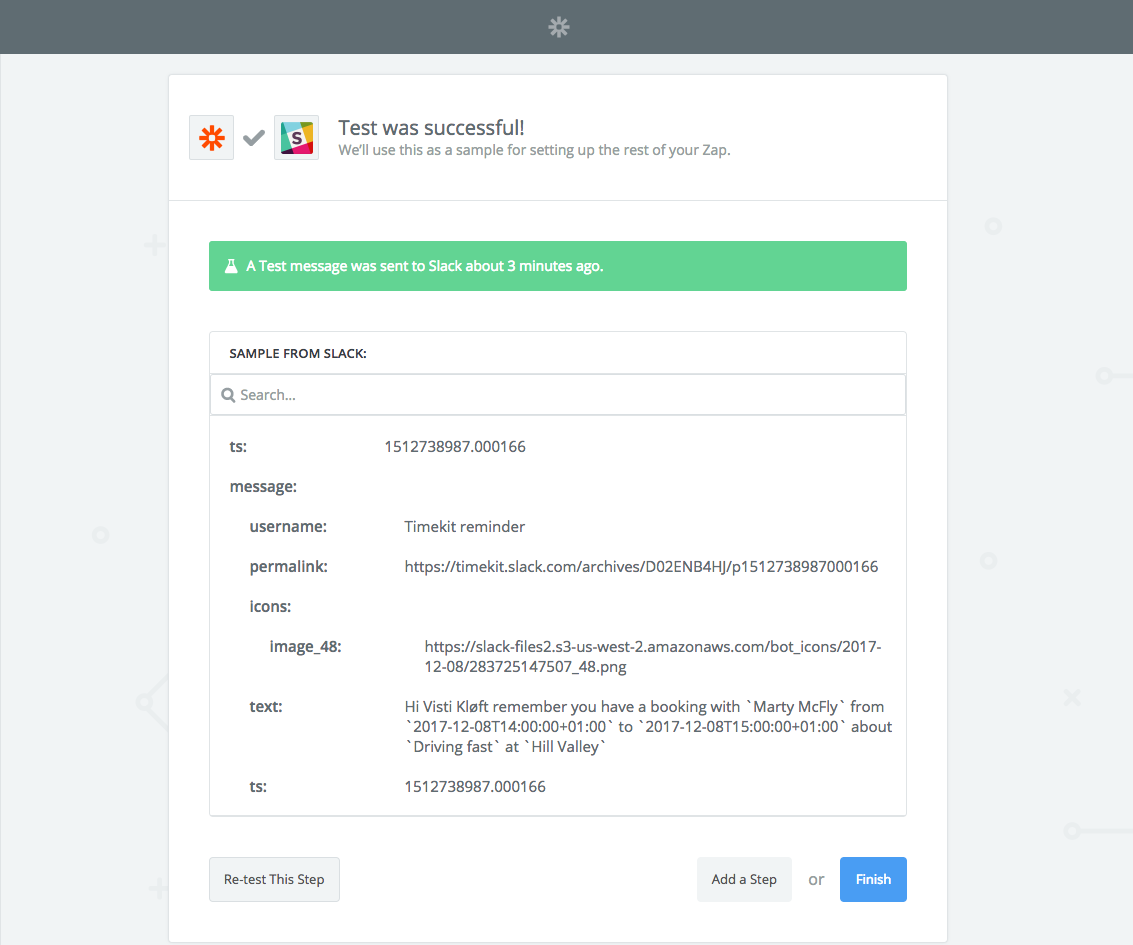
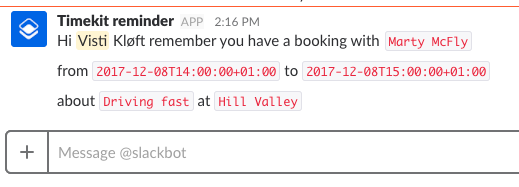
Step 7: Head over to Slack to see the test message
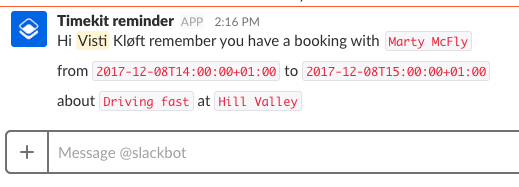
You have now setup a webhook that will fire off a Slack message 30 min before all upcoming bookings in the selected project - Hooray 🤘 !
*Note: Besides Slack Zapier can also be used to trigger emails, SMS and other posts and notifications in services. We like these guys:
Email:
Mandrill
Mailchimp
ActiveCampaign
Campaign Monitor
SMS & Chat:
Twilio
CallFire
TextMagic
Burst SMS
Other Services:
Slack
Trello
Salesforce
Intercom
Stripe
Updated over 7 years ago
